Utilizing Gameball’s Email Communication Campaigns
Gameball empowers you to customize email communication campaigns, including Guest emails, to enhance the customers’ journey and drive engagement. With Gameball’s Email Communication Campaign feature, you can create personalized emails for various scenarios, such as:Introduce New Collections
Announce new product lines and collections to keep customers informed and excited.
Showcase Products
Highlight featured or top-selling products to drive customer interest.
Offer Promo Codes
Deliver exclusive discount codes directly to customers’ inboxes.
Express Appreciation
Send thank-you messages to strengthen customer relationships and loyalty.
Configuring an Email Campaign
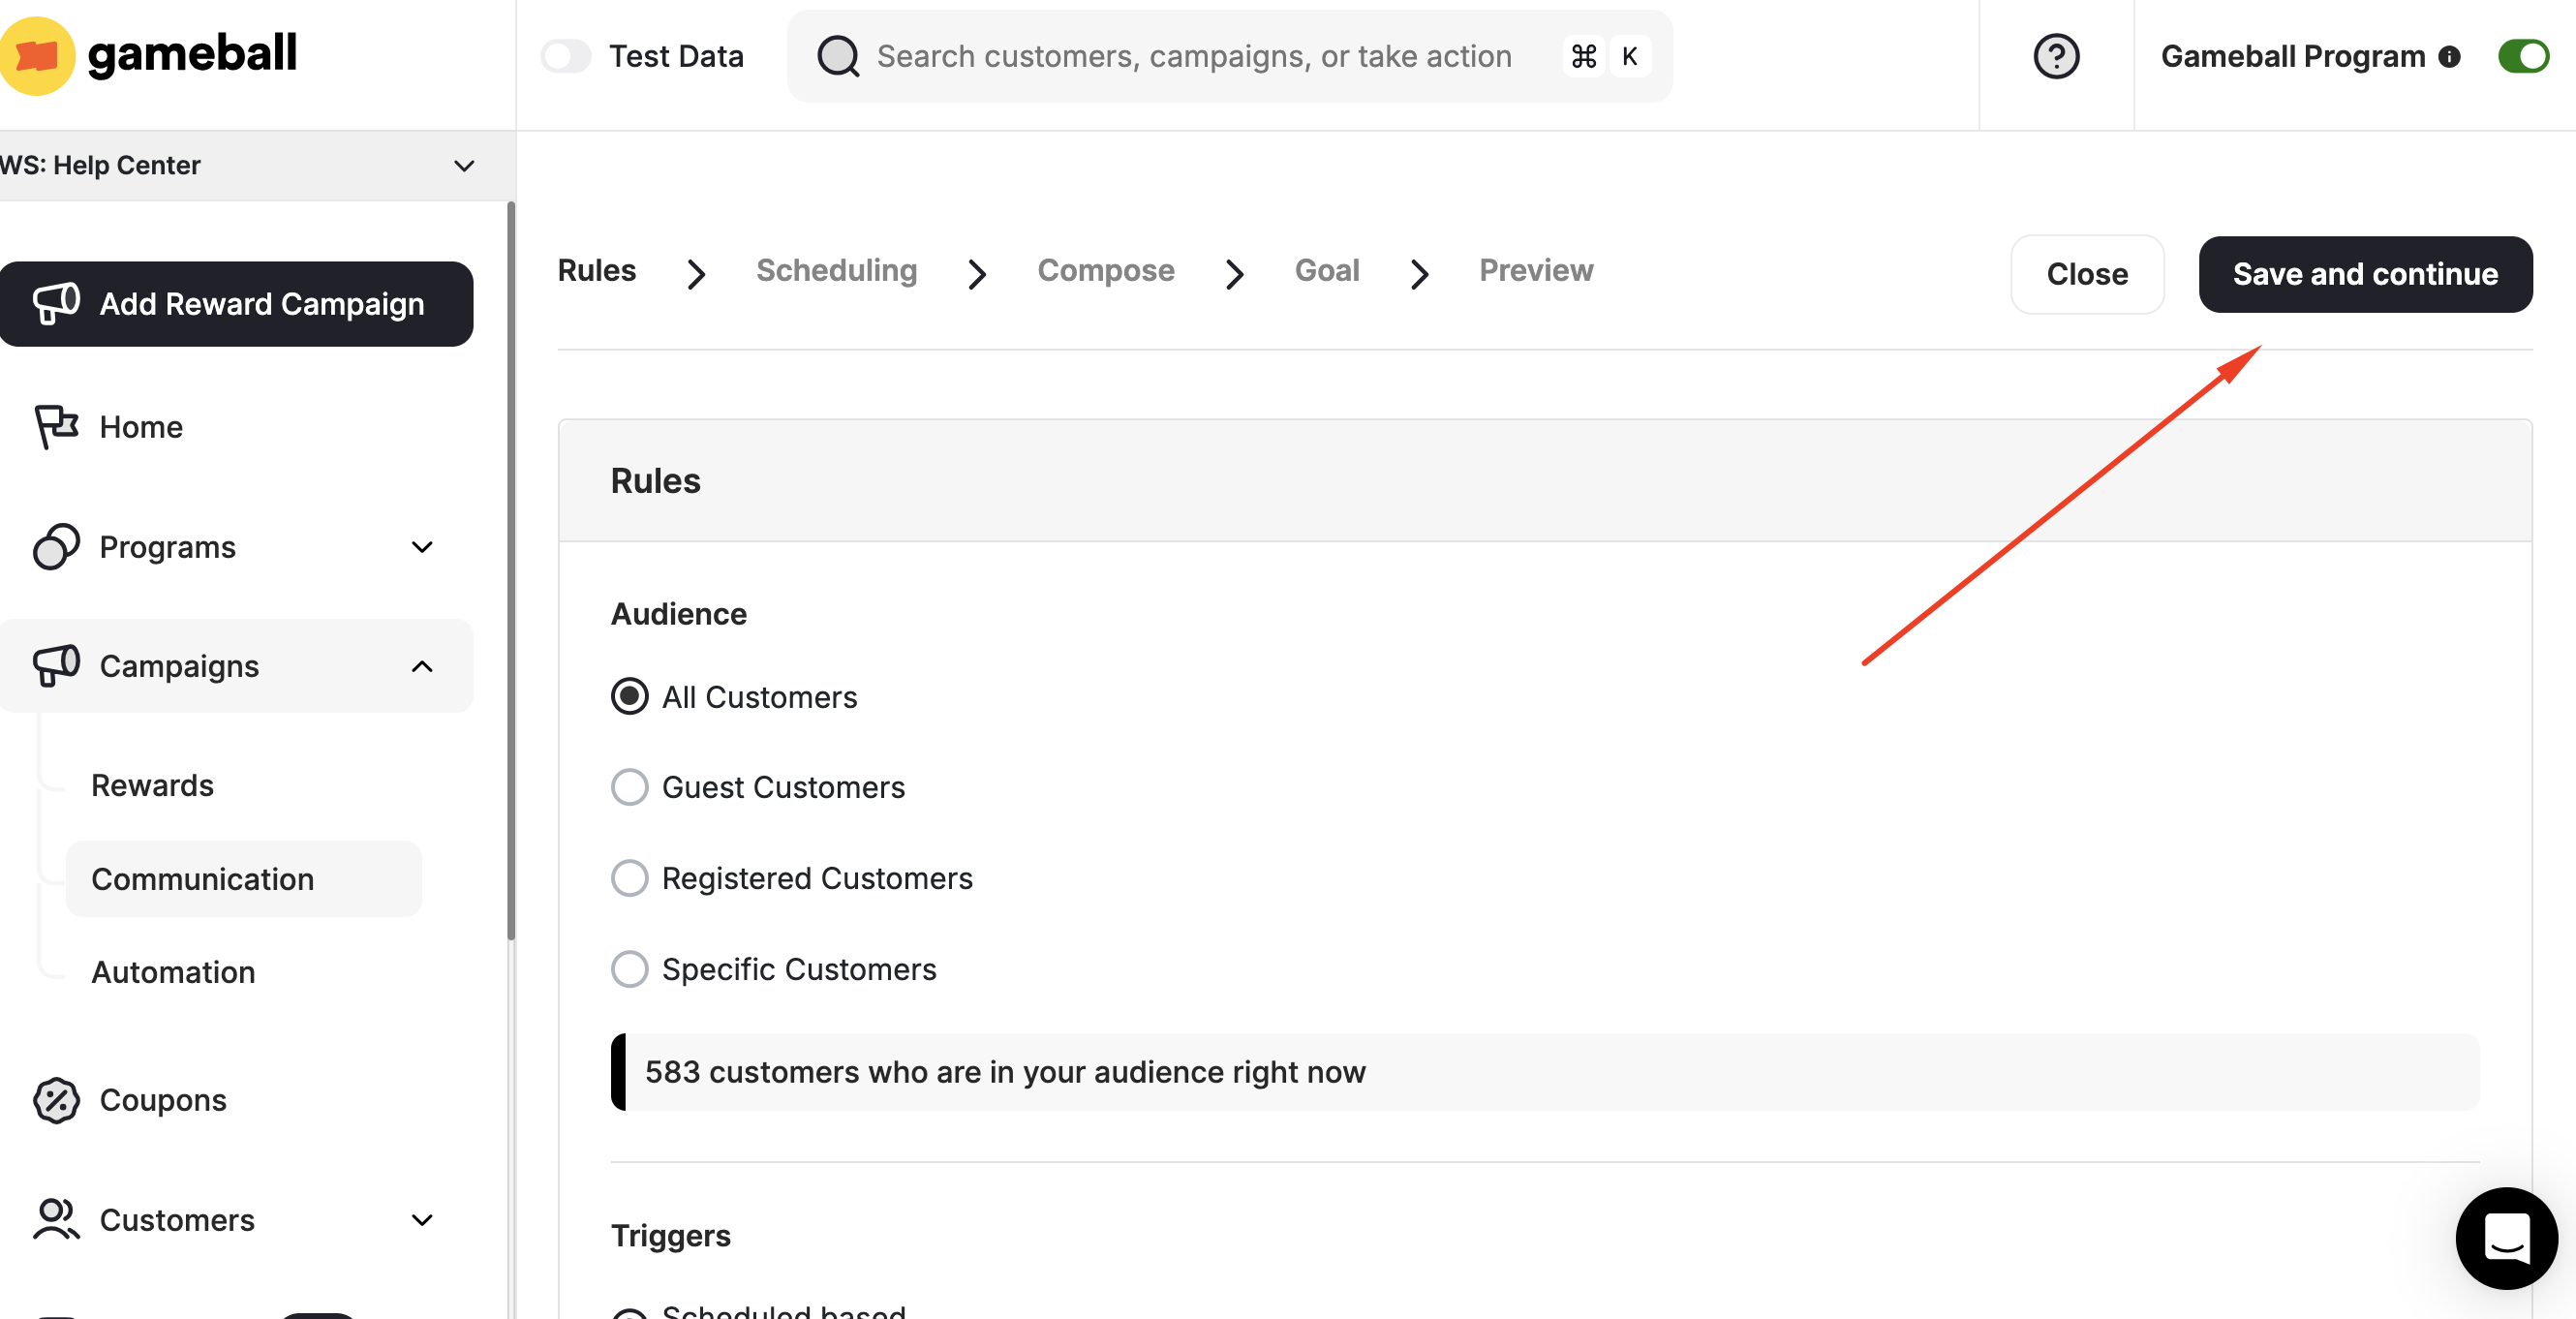
To set up an email communication campaign from scratch in Gameball, follow these steps:Create Communication Campaign
Choose Communication, then click on the Create Communication Campaign button.
Step 1: Rules
Set Your Audience
In the Audience section, choose who will receive this email: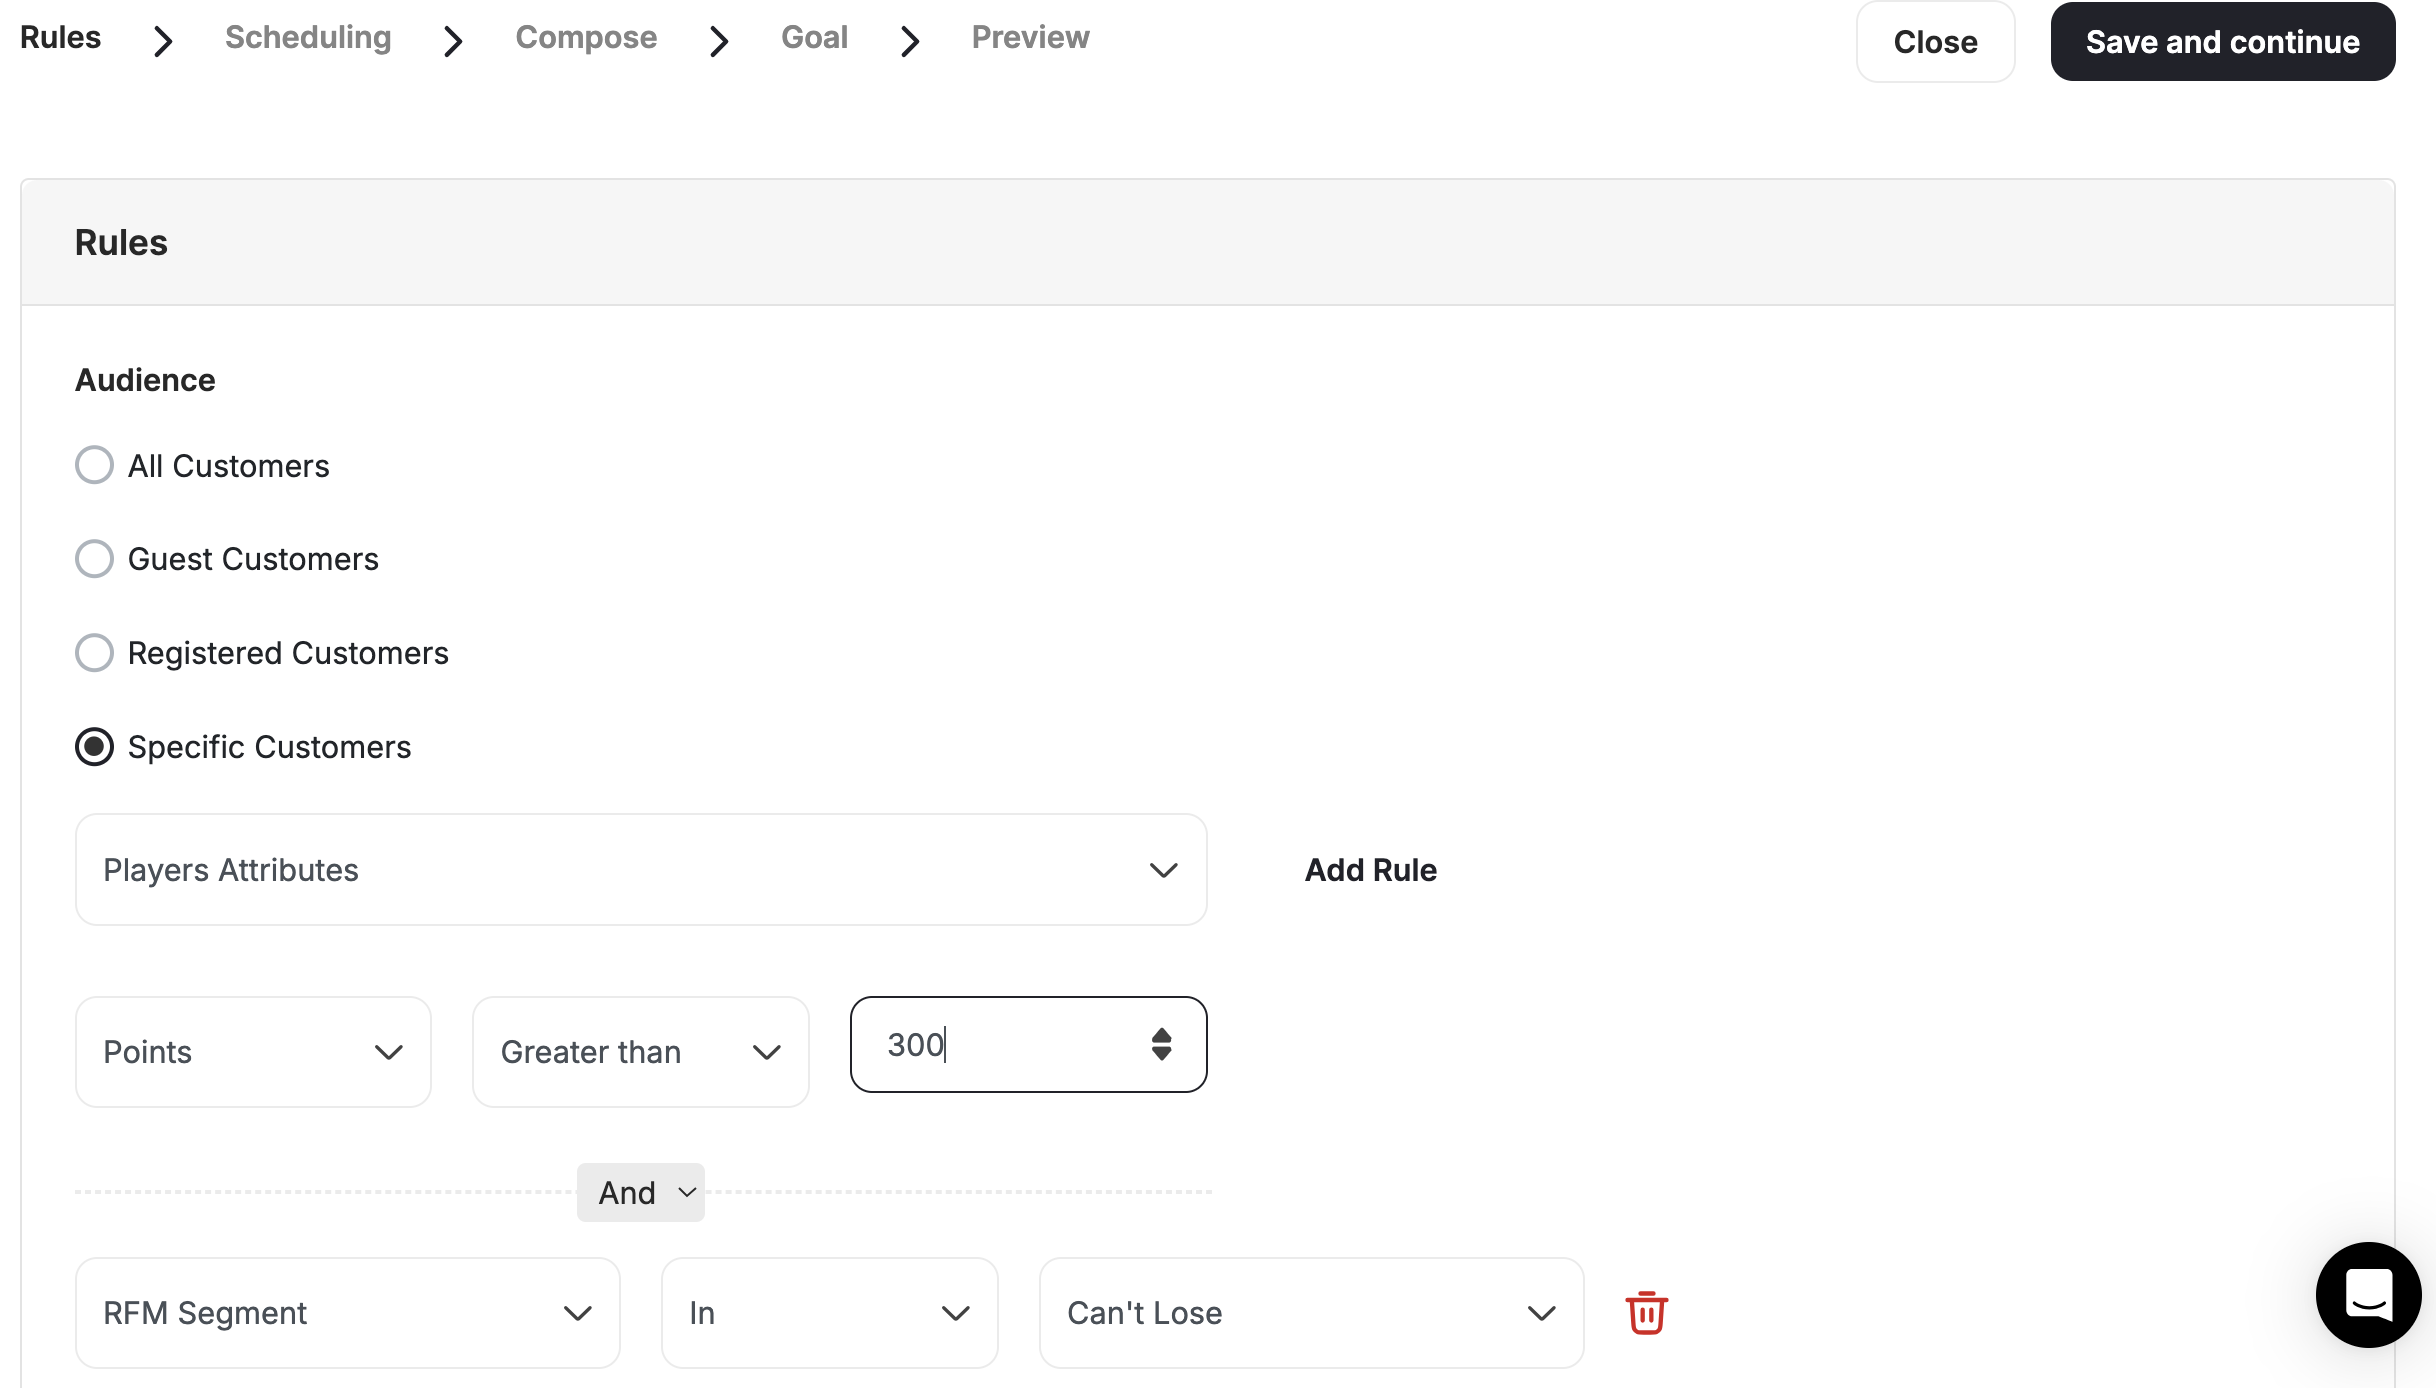
- All Customers (Registered & Unregistered)
- Guest customers (Unregistered Customer)
- Registered Customers (Customers with Accounts)
- Specific Customers based on:
- Segments
- RFM Segments
- Tags
- Customer Attributes
- Combination for Segments, Tags, or Customer Attributes
Define Triggers
Define what Triggers sending this email to your audience. You can choose between: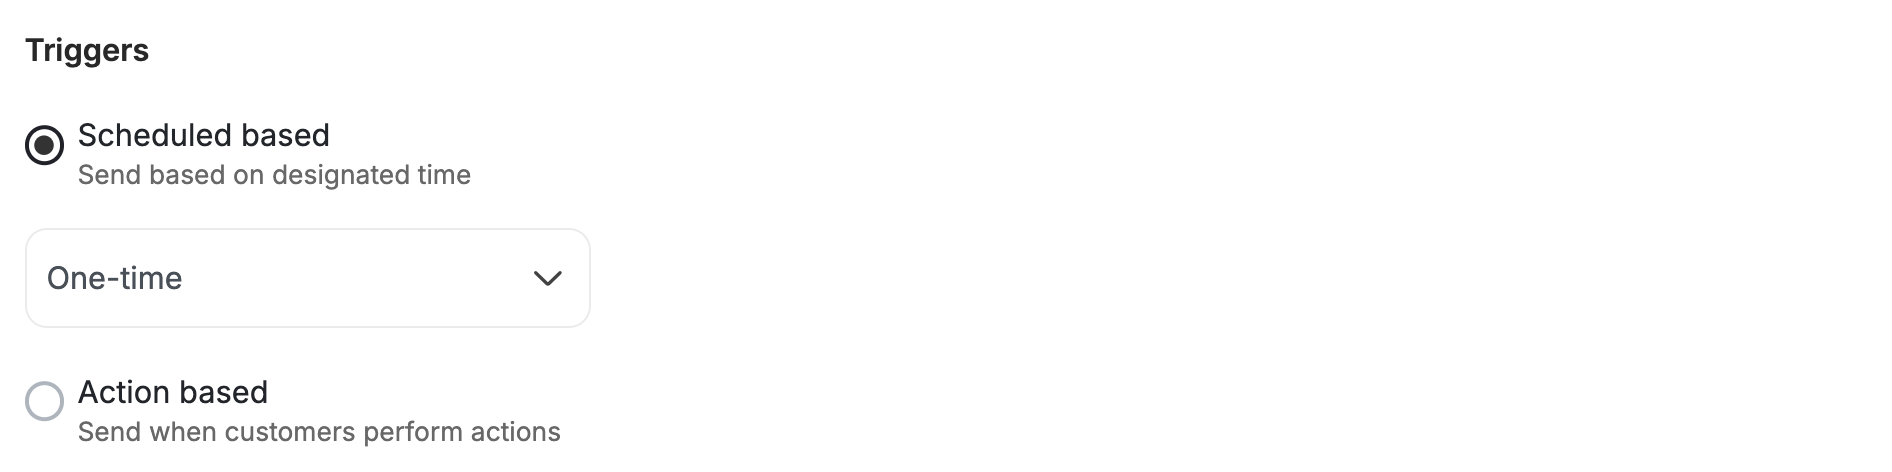
- Scheduled Based: All your audience will receive this email at a scheduled time. You can decide between:
- One-time: Email will be sent only once
- Recurring: Email will be sent more than once
- Action Based: All of your audience will receive this email once they complete a specific action. All you have to do is select the event from the drop-down and add its filters.
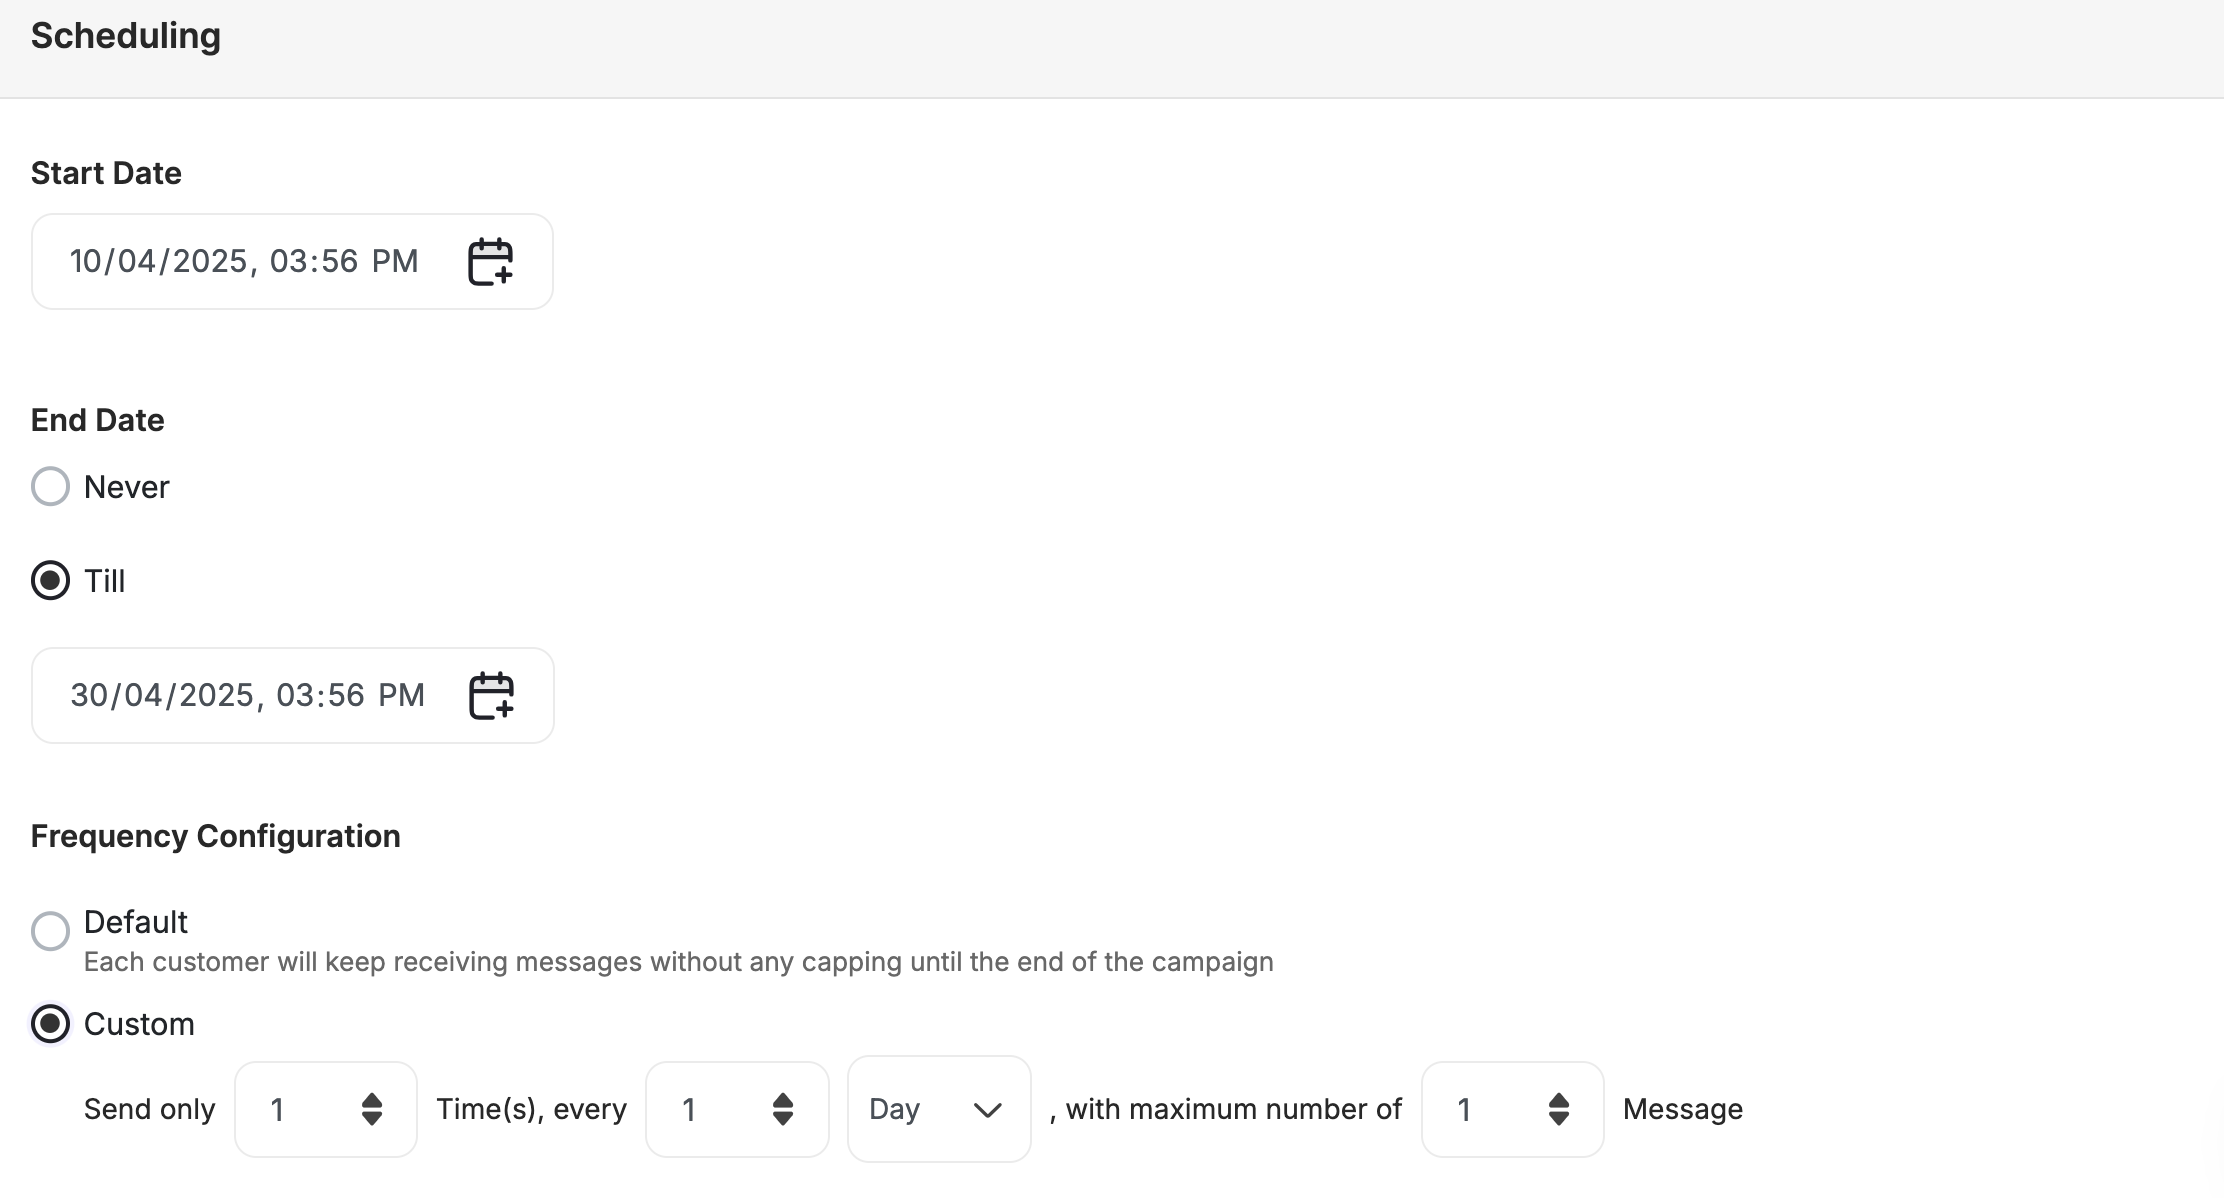
Step 2: Scheduling
Now let’s set the timing for sending the email, based on the trigger that you chose in the previous step.- Scheduled Based — One-Time
- Scheduled Based — Recurring
- Action Based
Choose one of these options: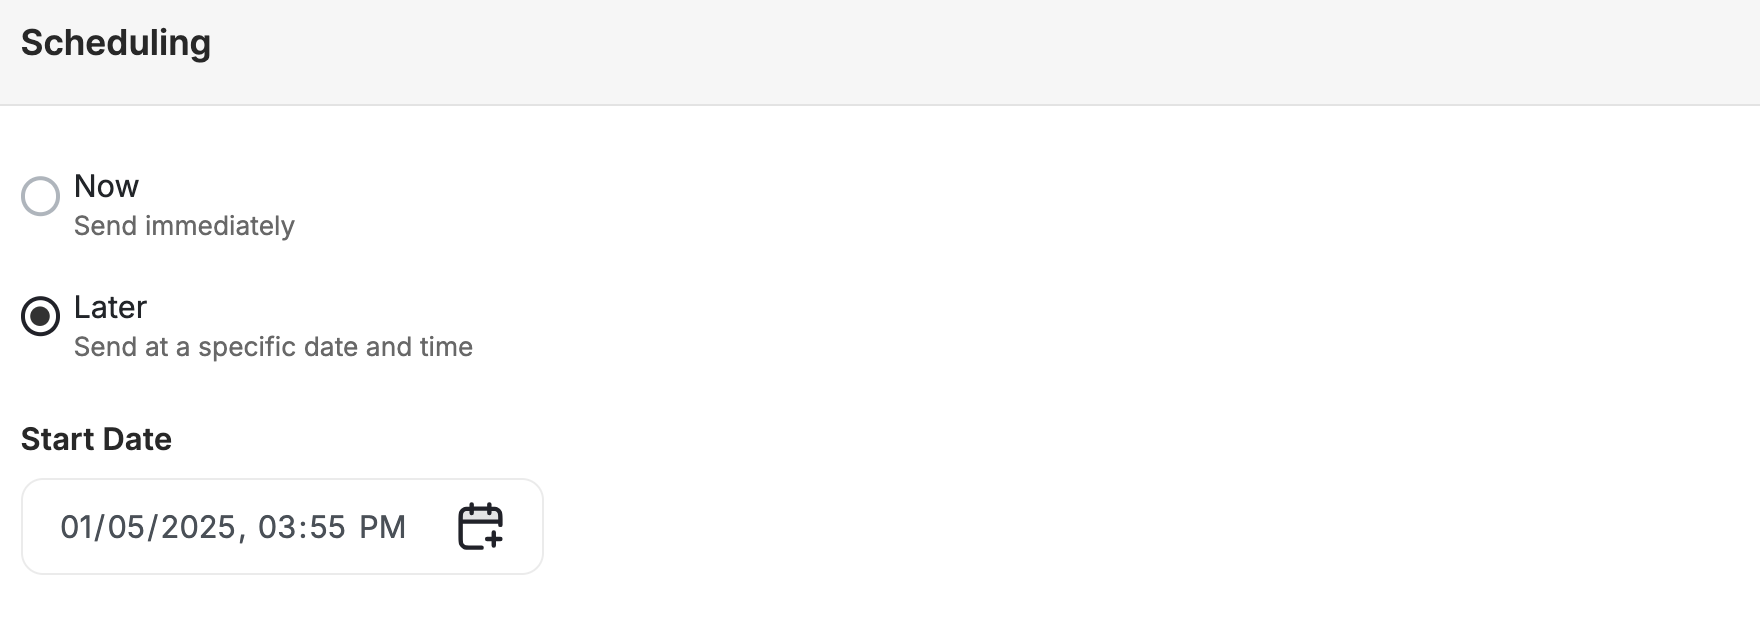
- Now: The email will be sent once the campaign is set live
- Later: The email will be sent on the Start Date that you choose
Step 3: Compose
Customize the Email Header
Customize the email header with sender information, subject line, and domain.
Design the Email Body
Design the email body using a range of customization options, including text, images, buttons, links, dividers, menus, and HTML.
Align with Campaign Goals
Ensure the email content aligns with the campaign goals and resonates with the target audience.
Step 4: Goal
Define the Campaign Goal
Define the goal of the email campaign, such as increasing sales or driving traffic to specific product pages.
Set Event Triggers and Timeframes
Set event triggers and timeframes to monitor customer actions in response to the email.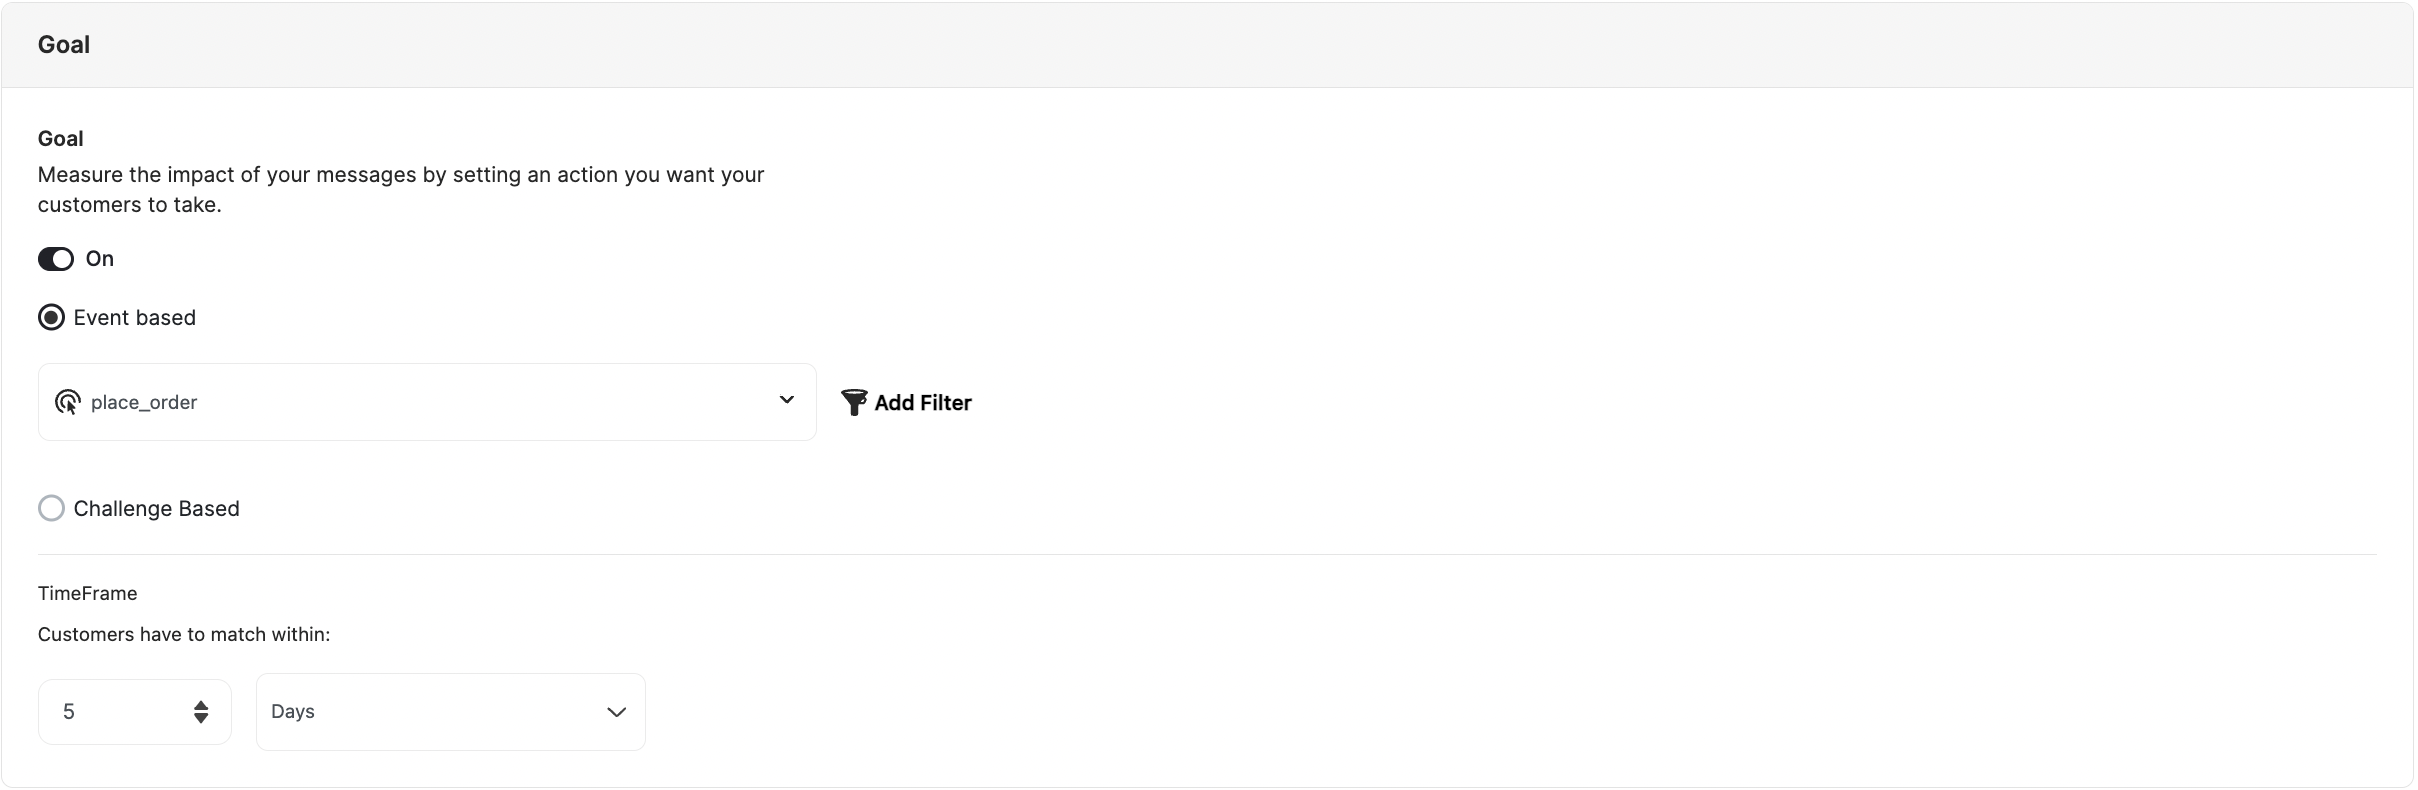
Step 5: Preview
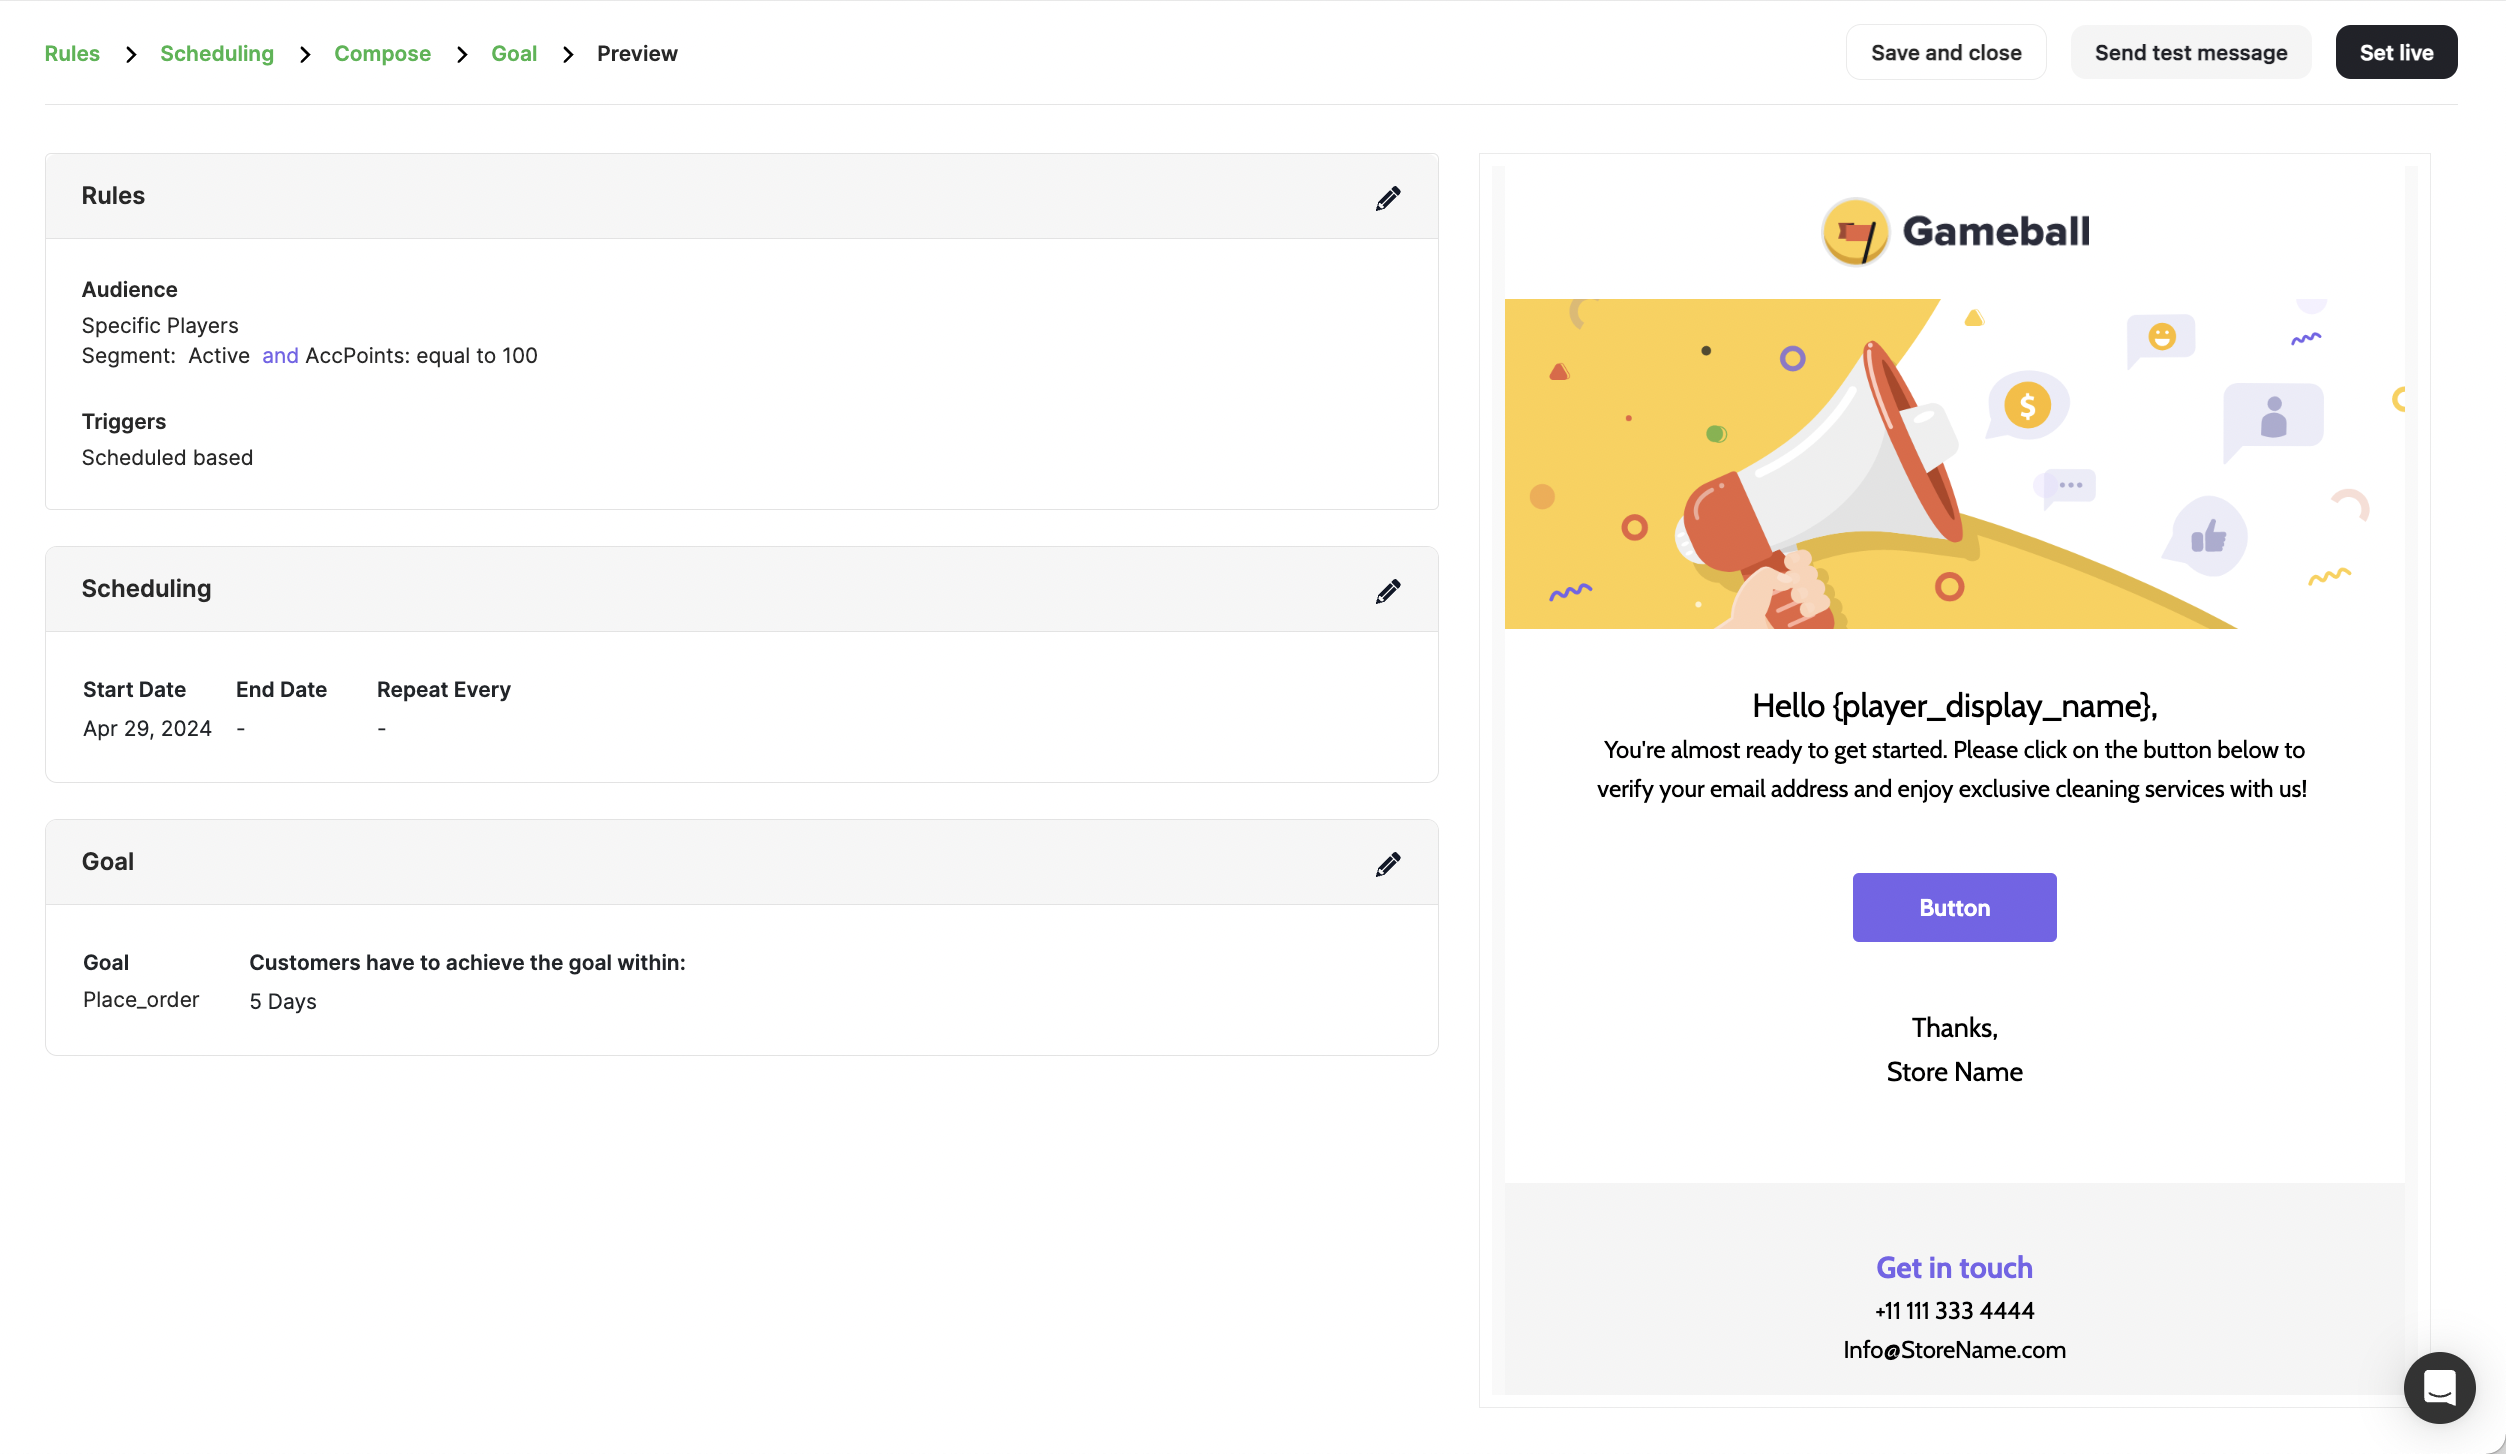
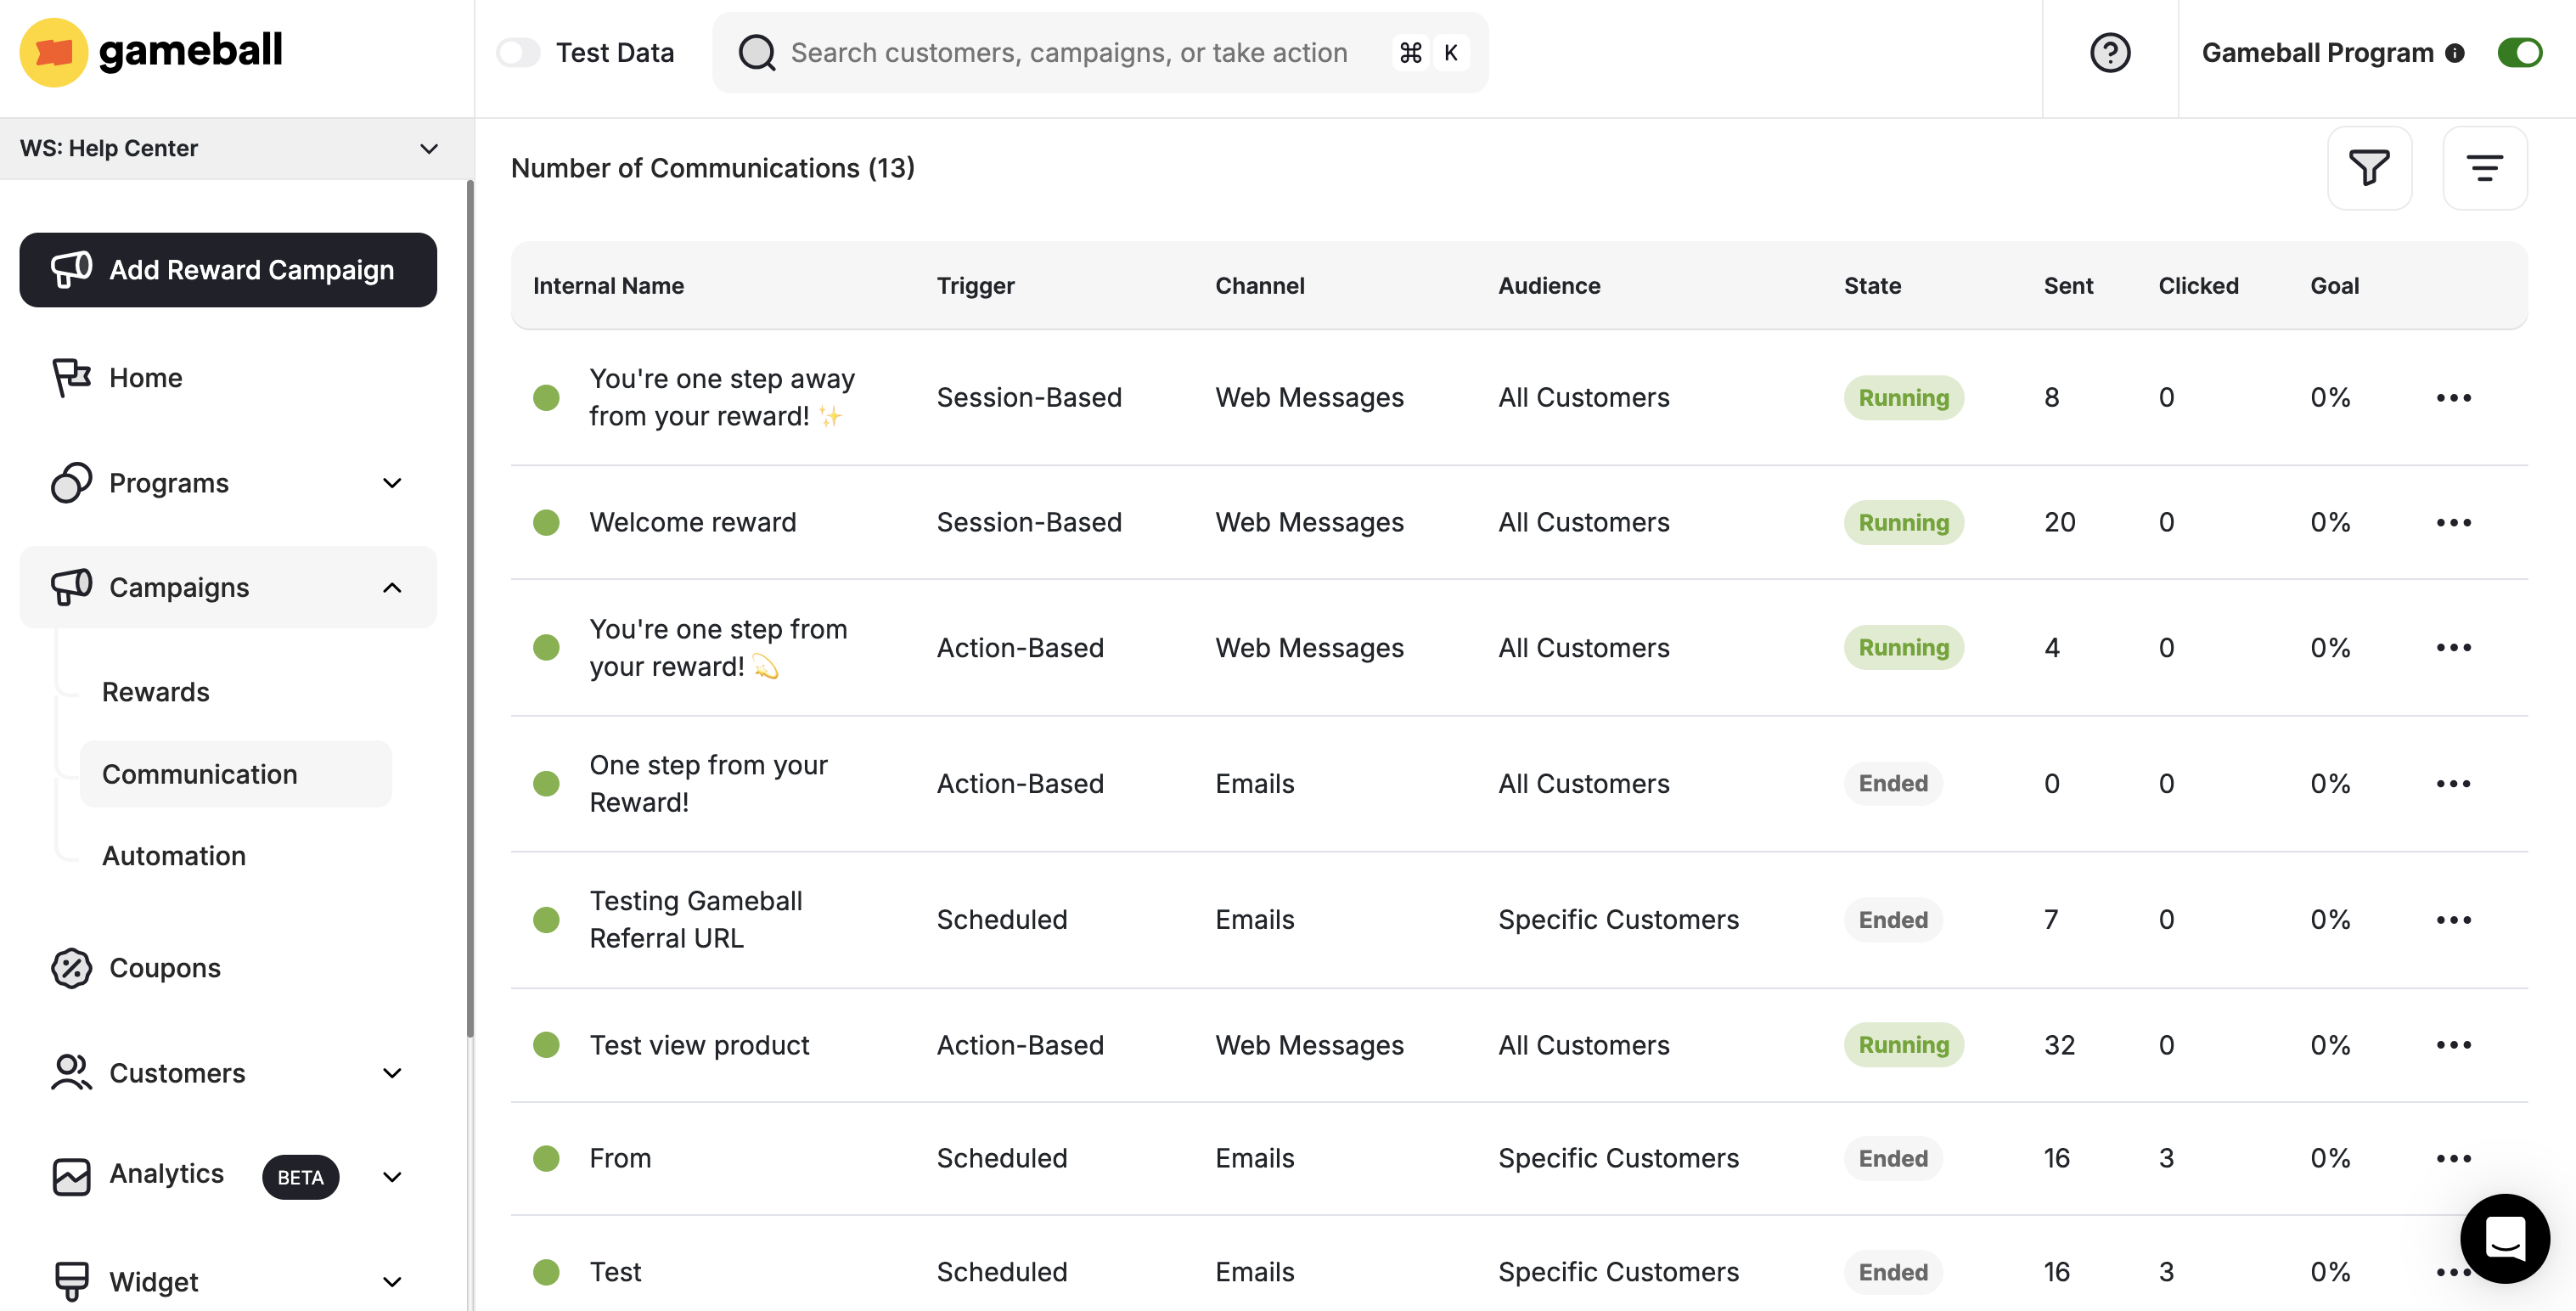
Viewing and Managing Configured Emails
- Access the Communication Campaigns section in the Gameball Dashboard to view all configured campaigns.
- Monitor key metrics such as triggers, audience, state, number of sent campaigns, clicks, and goal achievement percentage.
Tracking Email Performance and Customer Interaction
- Gain insights into email performance and customer interaction by selecting a specific campaign and viewing details.
- Check the list of customers who received the email and track their engagement, including clicks and goal achievements.
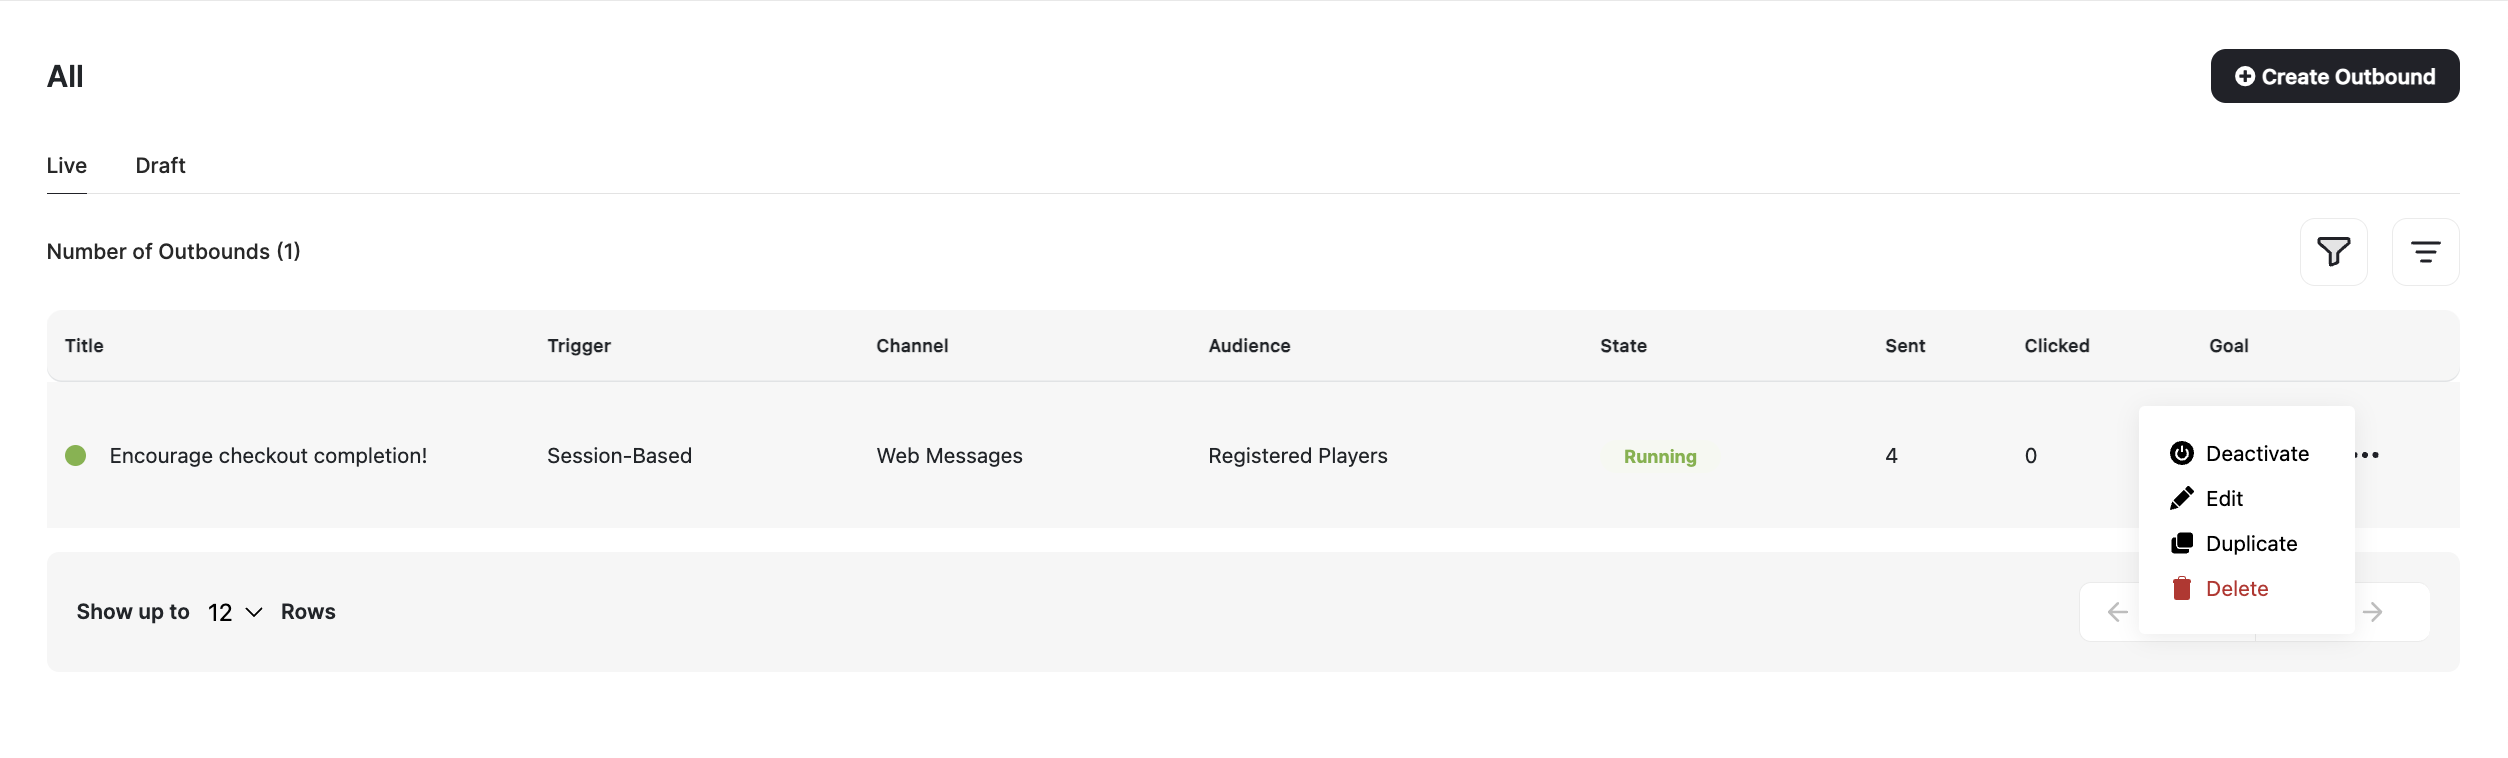
Deactivating or Deleting Email Communication Campaigns
- From the Communication Campaigns section in the Gameball Dashboard, select the desired email campaign.
- Click on the three dots icon to choose between deactivating/activating or deleting the campaign.
Create & Configure Web Messages
Set up web message campaigns to reach customers during their platform journey.
Create & Configure Push Notifications
Set up push notification campaigns to engage customers on mobile devices.
Create & Configure SMS Campaigns
Set up SMS campaigns for high-visibility, time-sensitive communications.