Prerequisites: Firebase Integration is required to send push notifications.
Understanding Mobile Push Notifications
Mobile push notifications are brief, timely messages that appear on users’ mobile device screens, allowing businesses to communicate with their audience in real-time. Unlike other forms of communication, mobile push notifications are highly visible and are less likely to be overlooked by users. Here are some ideas for campaigns that you can send out:Ask for Referrals
Prompt loyal customers to share their referral link and earn rewards for bringing in new users.
Promote Social Engagement
Encourage customers to follow, share, or interact with your brand on social platforms.
Offer a Welcome Reward
Greet new customers with a push notification offering a welcome reward to boost early engagement.
Newsletter Subscription
Ask customers to subscribe to your newsletter for exclusive updates and offers.
Configuring a Mobile Push Communication Campaign
To set up a Mobile Push communication campaign from scratch in Gameball, follow these steps:Create Communication Campaign
Choose Communication Campaigns, then click on the Create Campaign button.
Step 1: Rules
Set Your Audience
In the Audience section, choose who will receive this mobile push: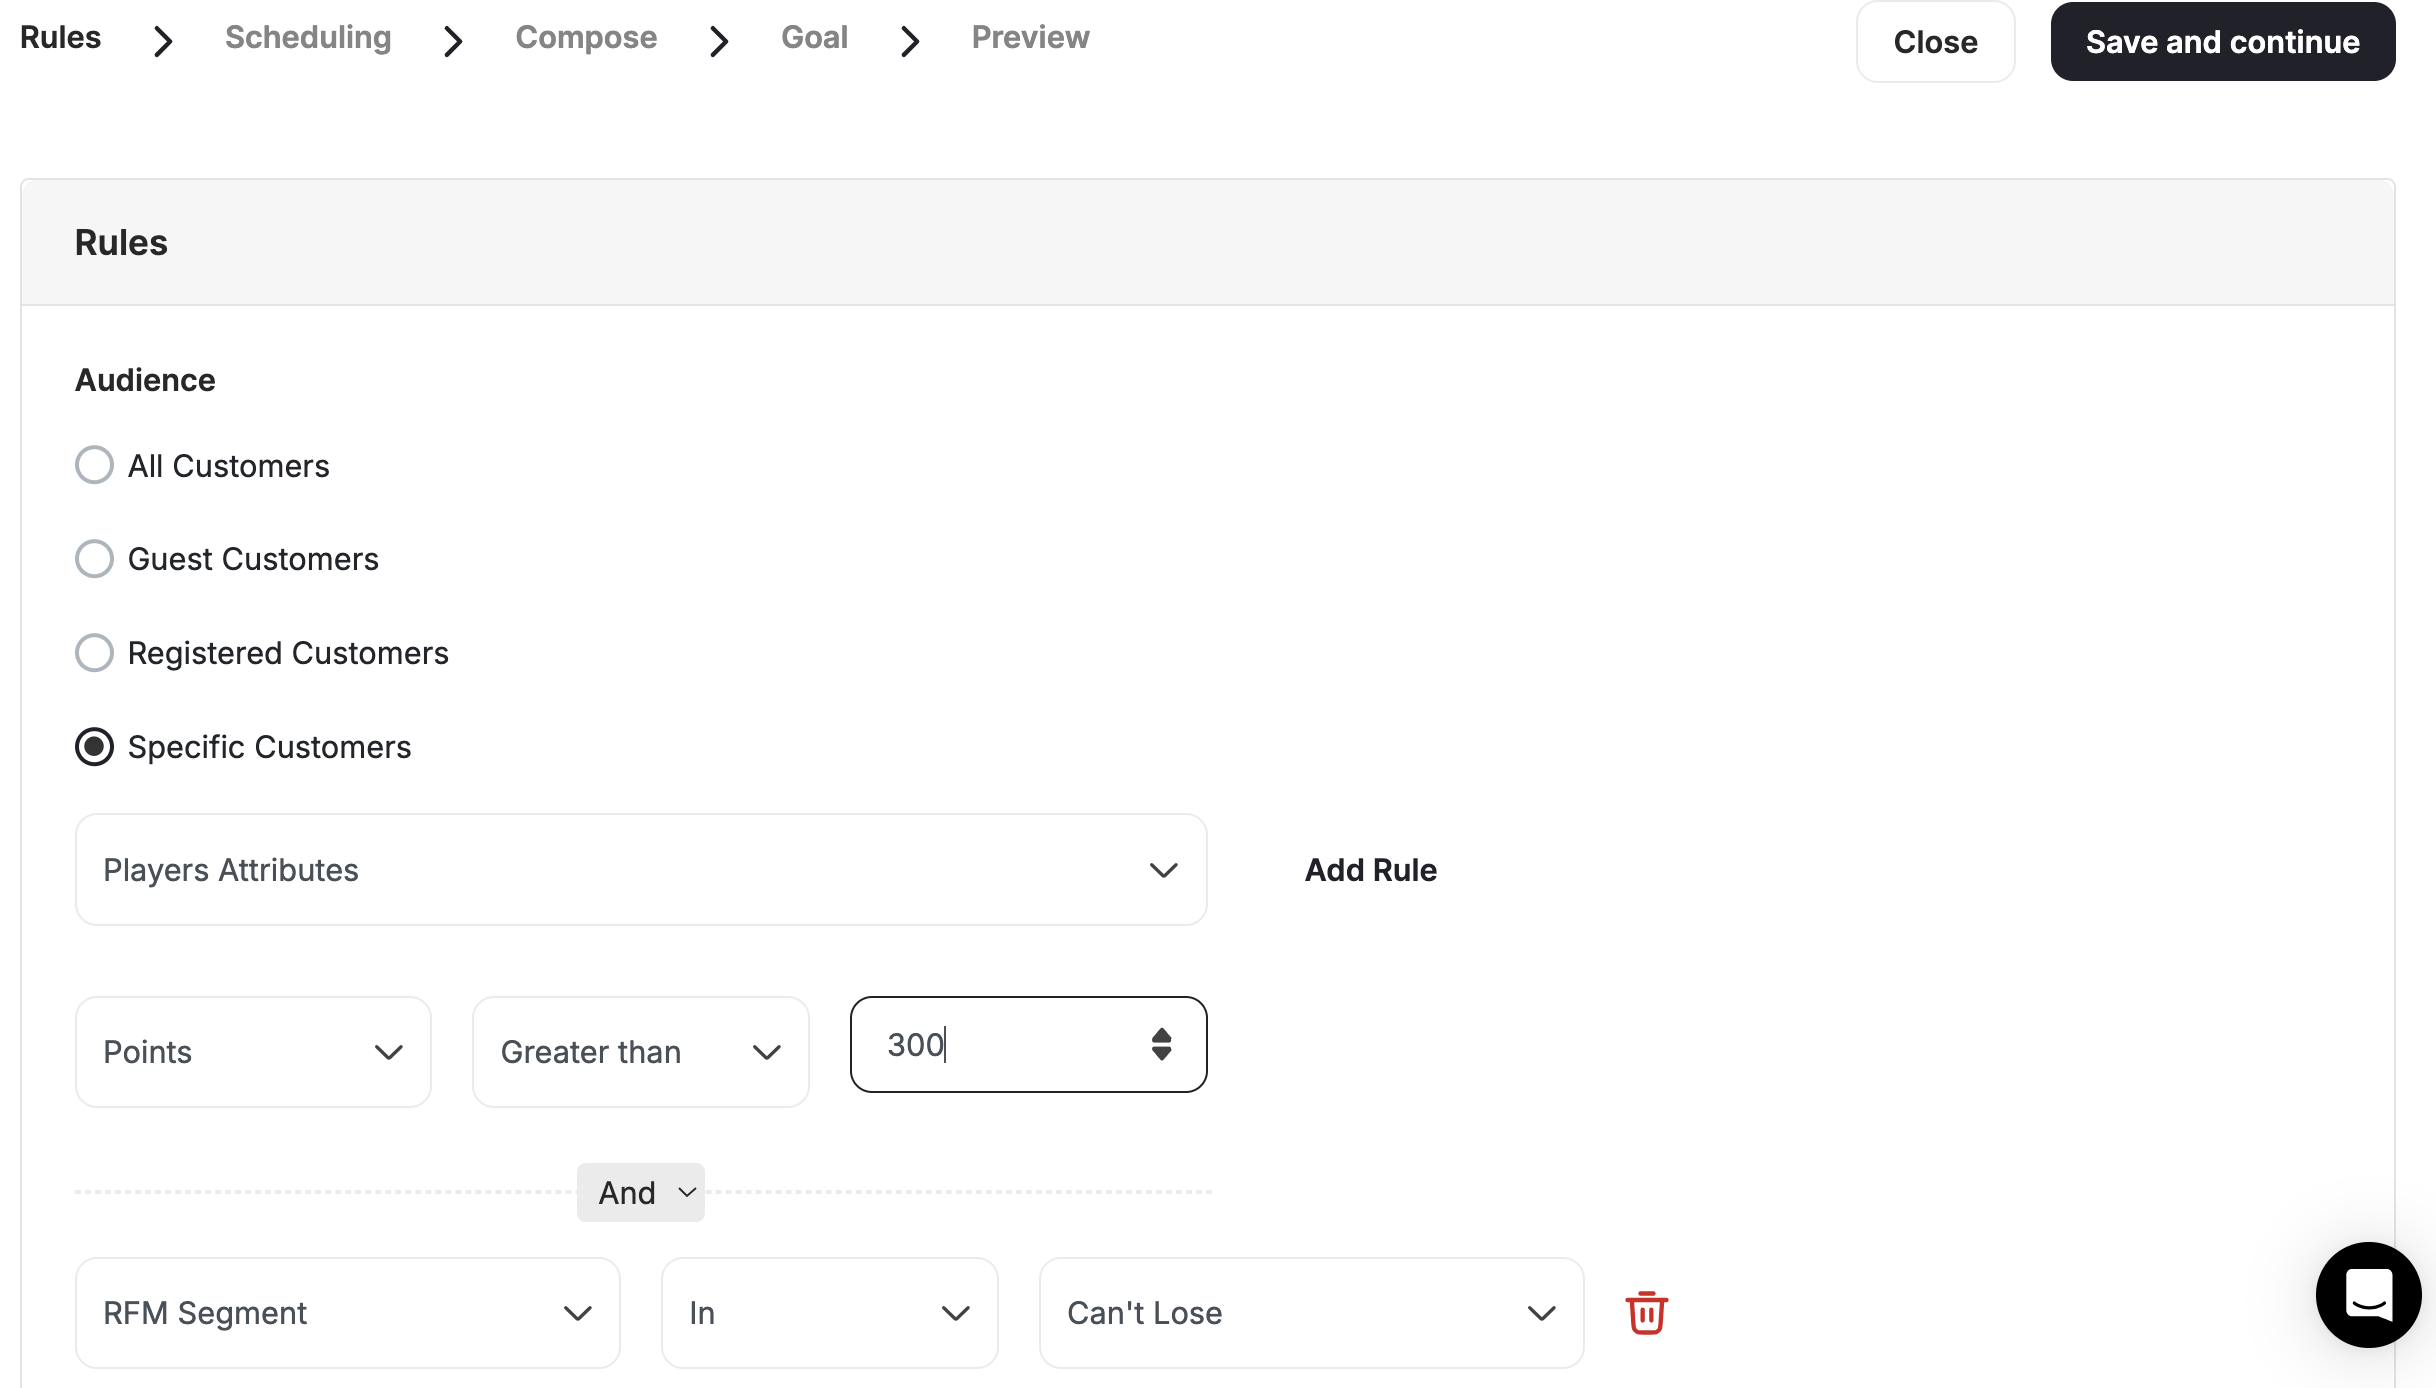
- All Customers (Registered & Unregistered)
- Guest customers (Unregistered Customer)
- Registered Customers (Customers with Accounts)
- Specific Customers based on:
- Segments
- RFM Segments
- Tags
- Customer Attributes
- Combination for Segments, Tags, or Customers Attributes
Define Triggers
Define what Triggers sending this mobile push to your audience. You can choose between:
- Scheduled Based: All your audience will receive this mobile push at a scheduled time. You can decide between:
- One-time: Mobile Push will be sent only once
- Recurring: Mobile Push will be sent more than once
- Action Based: All of your audience will receive this mobile push once they complete a specific action. All you have to do is select the event from the drop-down and add its filters.
Step 2: Scheduling
Now let’s set the timing for sending the push notification, based on the trigger that you chose in the previous step.- Scheduled Based — One-Time
- Scheduled Based — Recurring
- Action Based
Choose one of these options:
- Now: The mobile push will be sent once the campaign is set live
- Later: The mobile push will be sent on the Start Date that you choose
Step 3: Compose
Customize Message Content
Customize the content and design of the communication campaign, including the message title and body text.
Craft a Compelling Message
Craft a compelling message that grabs users’ attention and encourages action, such as promoting new collections, products, sales, or promo codes.
Step 4: Goal
Define the Campaign Goal
Define the goal of the communication campaign, such as increasing product views, driving conversions, or boosting engagement.
Set Event Triggers and Timeframes
Set event triggers and timeframes to monitor user actions in response to the communication campaign.
Step 5: Preview
Review Configurations
Review and edit the configured settings to ensure alignment with campaign objectives and user preferences.
Send a Test Message
Send a test message to preview the communication campaign before sending it to users.
Viewing and Managing Communication Campaigns
- Access the Communication Campaign section in the Gameball Dashboard to view all configured campaigns, including mobile push.
- Monitor key metrics such as triggers, audience, state, number of sent campaigns, clicks, and goal achievement percentage.
Tracking User Interaction and Performance
- Gain insights into user interaction with communication campaigns by selecting a specific campaign and viewing details.
- Identify users who received the notification and track their engagement, including clicks and goal achievements.
Deactivating or Deleting Communication Campaigns
- From the Communication Campaign section in the Gameball Dashboard, select the desired communication campaign.
- Choose to deactivate/activate or delete the campaign from the options menu.
Create and Configure Email Campaigns
Set up email campaigns to reach customers with personalized messages.
Create and Configure Web Message Campaigns
Set up web message campaigns to engage customers during their platform journey.
Create and Configure SMS Campaigns
Set up SMS campaigns for fast, high-visibility mobile communications.