Plan Availability
- Shopify & Salla
- Non-Platform
| Plan | Available |
|---|---|
| Pro & Guru | Yes |
Creating a New Time-Based Reward Campaign
Navigate to Reward Campaigns
Log in to your Gameball Dashboard. Navigate to the Campaigns section on the left side menu and click on Rewards.
Configuration of a Time-Based Reward Campaign
Rule
Define the rules that determine when customers receive the campaign’s rewards.
Audience
Audience
Choose who is eligible to view and participate in this campaign: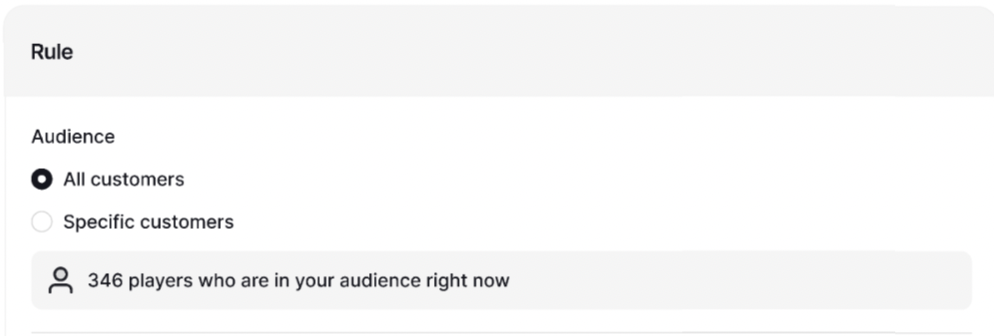
- All Customers
- Specific Customers:
- Segments
- Tags
- Customer Attributes
- Combination of Segments, Tags, or Customer Attributes
Trigger
Trigger
Choose when you want your audience to receive the reward: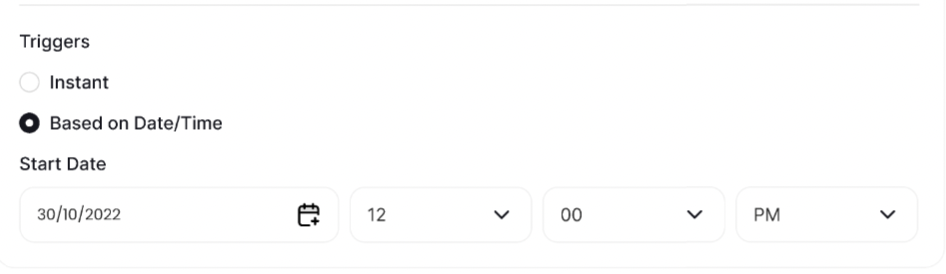
- Instant: the audience will receive the reward once the campaign is activated.
- Based on Date/Time: the audience will receive the reward on the date and the time you choose.
Details
Set up the information that will be displayed to the customers on Gameball’s widget on your website/mobile app: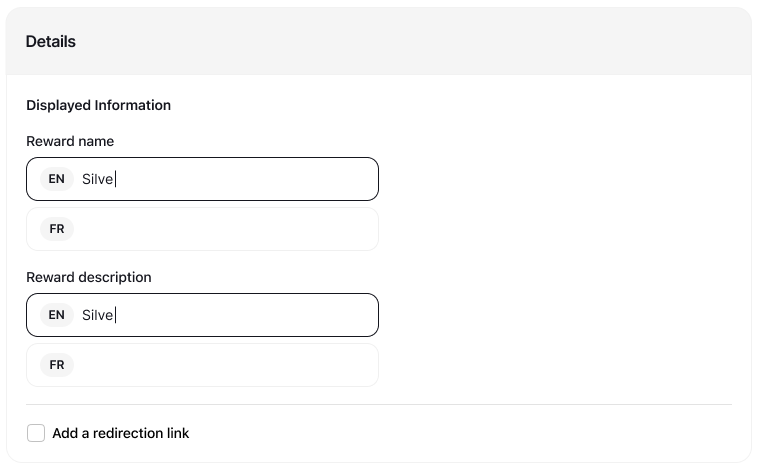
- Reward Name
- Reward Information
- [Optional] Redirection Link (Navigates the customers to a desired page on the website/mobile app).
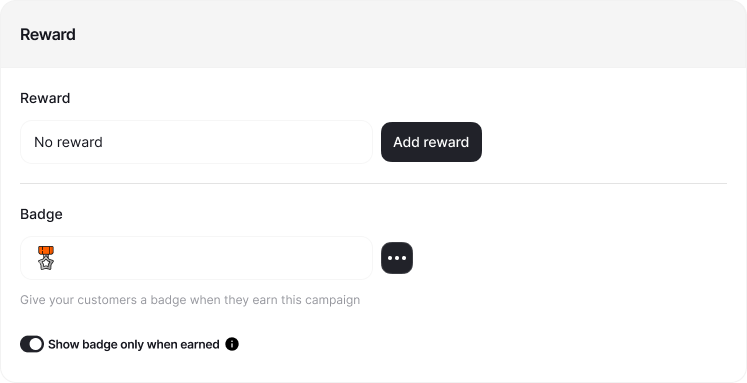
Rewards & Badges
RewardChoose the type of reward that you will offer the audience once they achieve this campaign, and define the reward parameters to ensure it aligns with your campaign goals.Choose one of the following Reward Types: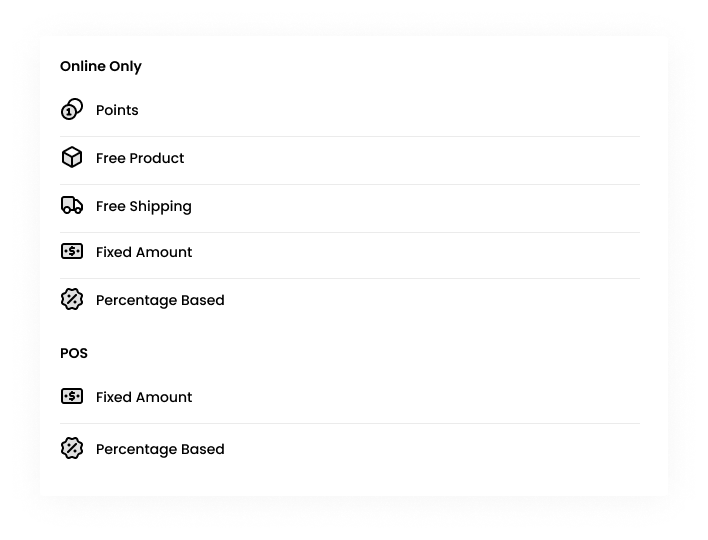
- Points
- Free Product
- Free Delivery
- Fixed Amount
- Percentage Based Discount
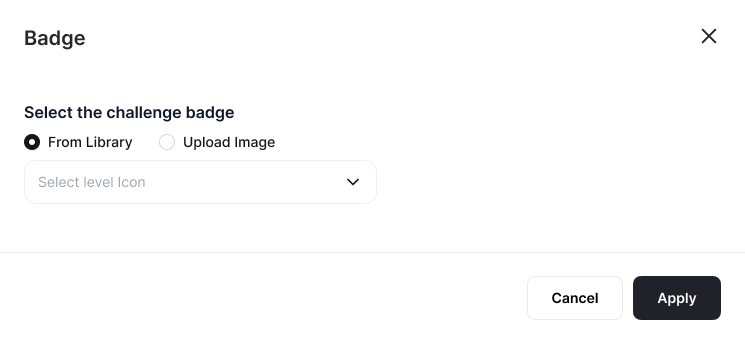
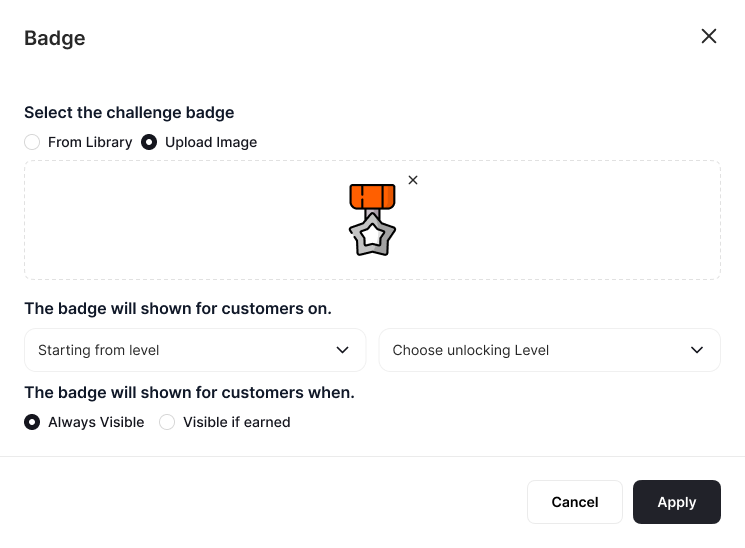
- Choose a Badge Icon from available options or upload your own:
-
Configure Badge Visibility:
- By default, no badge will be chosen (Campaign not visible on the widget).
-
You can choose for it to be:
- Dimmed and becomes bright upon earning
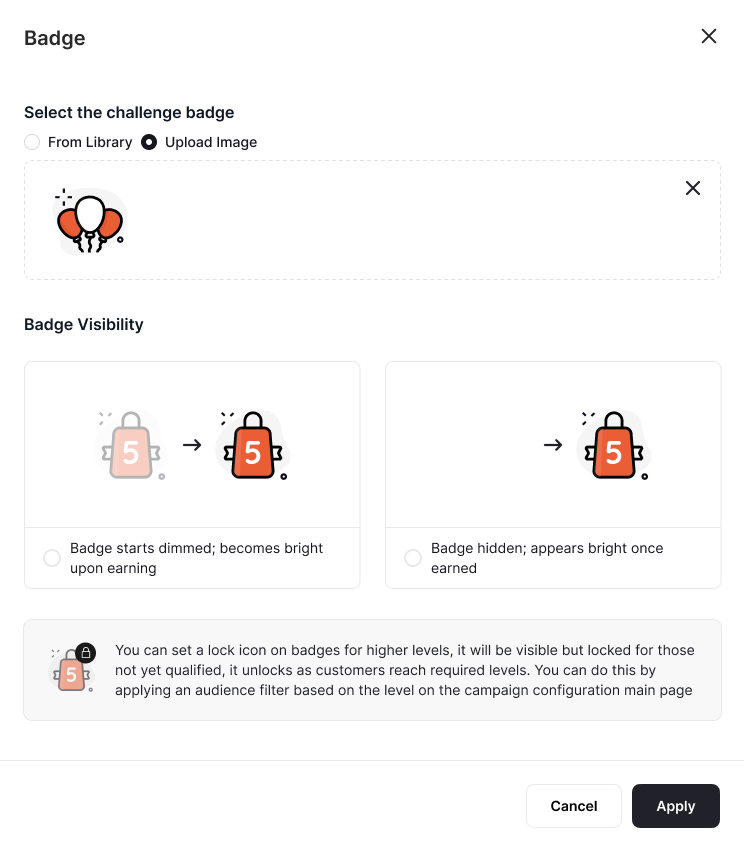
- Only show badge when earned
-
Configure Badge Unlocking Process:
By default, the badge will be unlocked to all tiers; it will appear dimmed until earned. However, you can choose for the badge to start appearing to customers when they are on a certain tier:
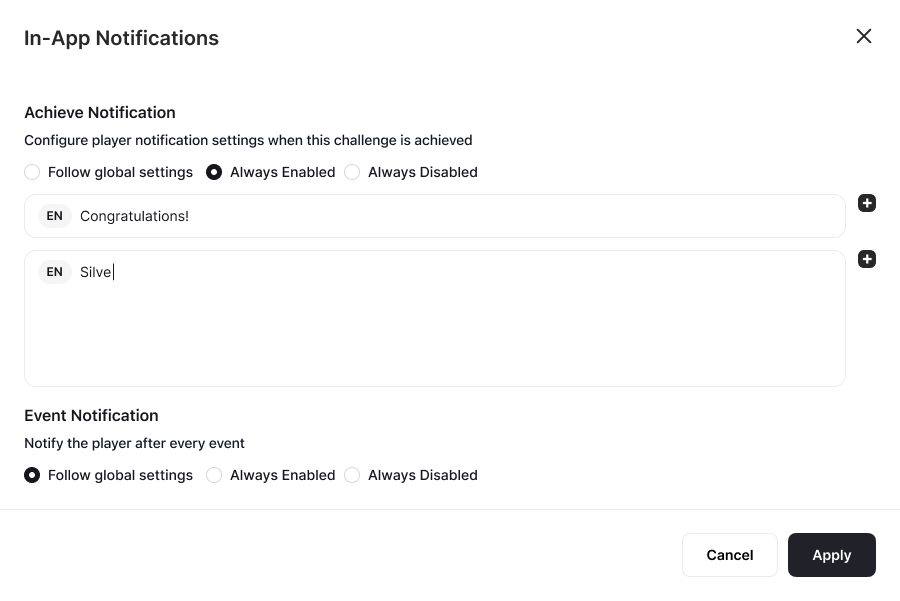
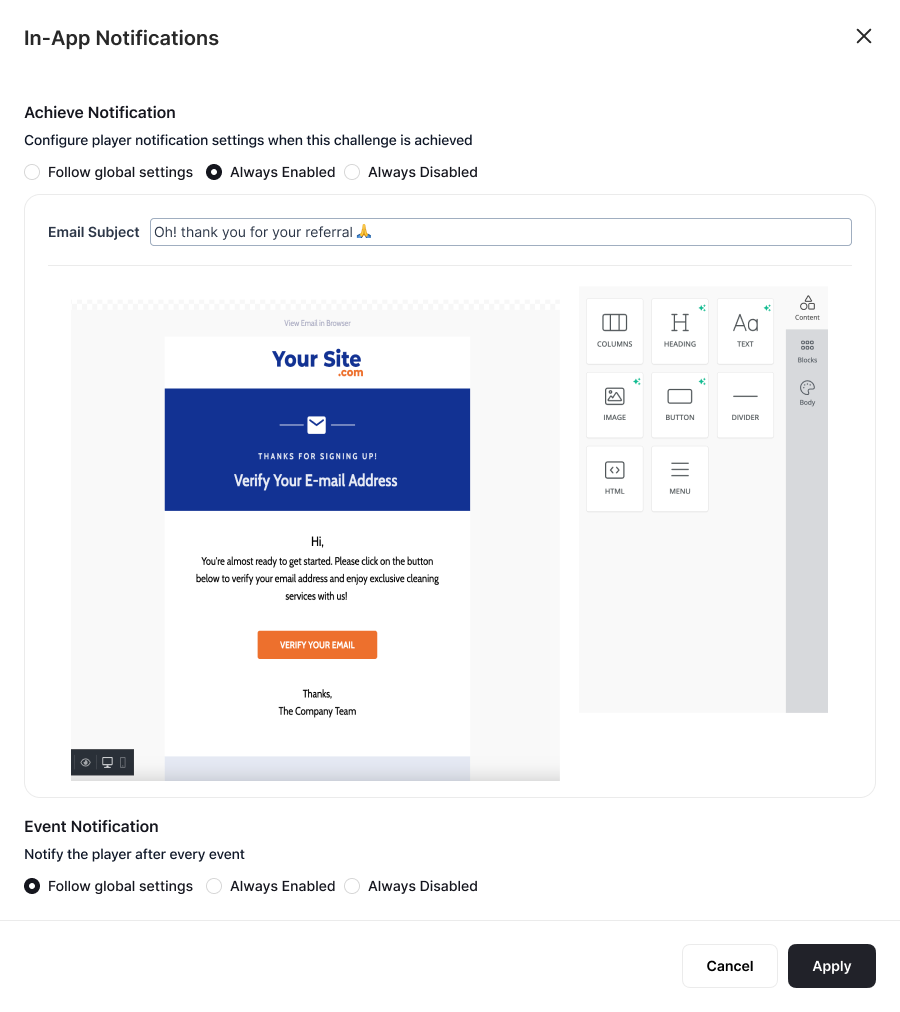
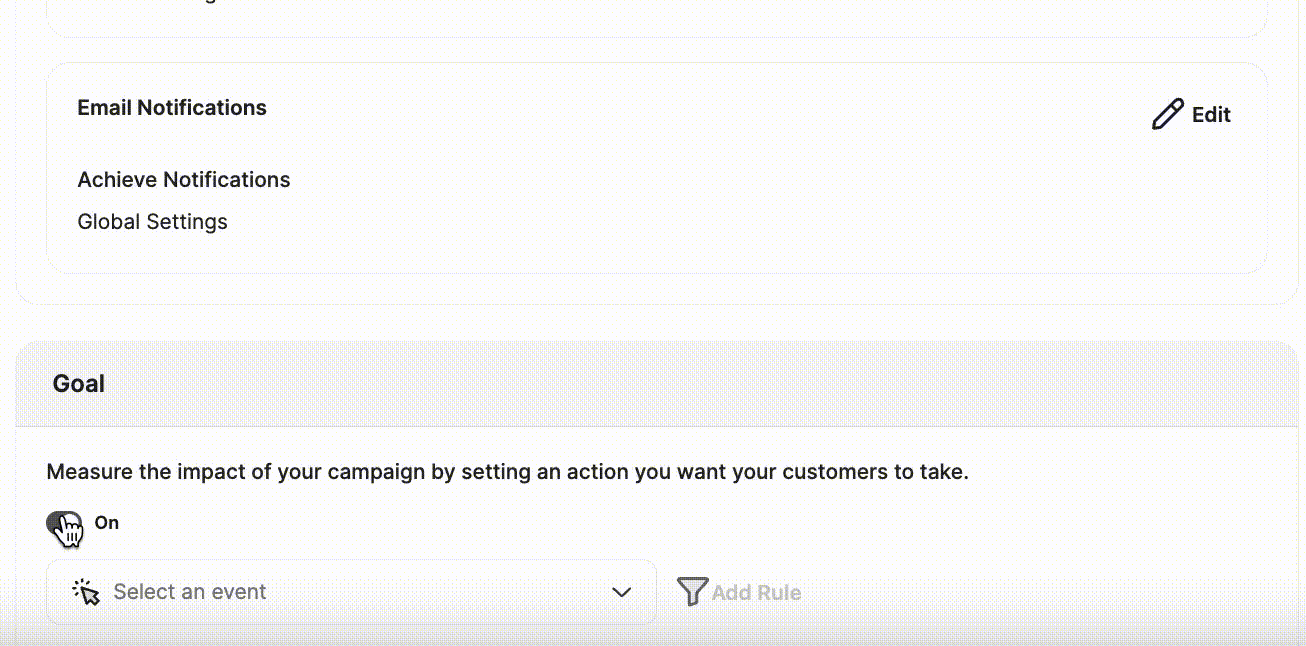
In-App & Email Notification
Configure in-app and email notifications to keep customers informed about their progress and achievements.
For both Notification types, you have the option to choose from the following: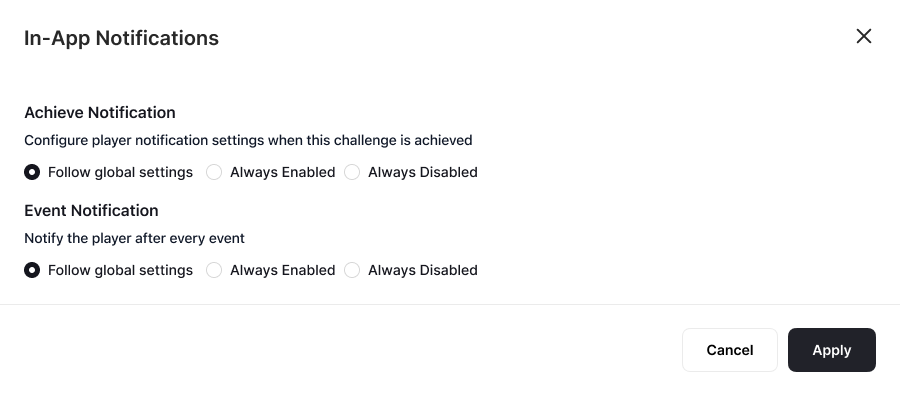
Achievement Notifications
Achievement Notifications
Decide whether you’d like to inform your customers upon achieving a reward campaign milestone.
Event Notification
Event Notification
Available for event-based and high-score reward campaigns only. Select whether to notify customers after every completed action that brings them closer to achieving the reward campaign.
- Follow Global Settings: Notifications will adhere to the predefined notification settings you configured in the notifications section. Learn more about sending real-time notifications for reward campaign programs.
-
Always Enabled: Customers will receive a notification after completing an event or reward campaign.
- In-app Notification: Add Notification Title and Notification Body.
- Email: Add Email Subject and use the Email Builder to Customize the Email.
- Always Disabled: Customers will not receive any notifications after completing an event or reward campaign.
There are other types of Reward Campaigns. Learn how to create and configure each of them below:
Related Articles
Reward Campaign Insights
Explore the full setup guide for reward campaigns, including events, rewards, and notifications.